
There is a wide range of errors which causes Blue Screen of Death which leads to restart or shutdown of your PC. One such error is the Blue Screen Registry Error 51. In order to prevent damage to your system, these errors tend to restart your PC showing blue screen. But you need to fix these serious errors as soon as you can so as to stop getting interrupted while doing important tasks on your computer.
Table of Contents
- 1 What is Blue screen Registry Error 51??
- 2 Cause for the Blue Screen Registry Error 51
- 3 Methods to fix Blue Screen Registry Error 51
- 3.1 Method 1: Clean Boot Process
- 3.2 Method 2: By Repairing with the Windows 10 Bootable Disc
- 3.3 Method 3: Run System File Checker (SFC) and Check Disk (CHKDSK)
- 3.4 Method 4: Run Advanced Memory Diagnostic Tool (Memtest86+)
- 3.5 Method 5: By Updating your Drivers
- 3.6 Method 6: Run System Restore
- 3.7 Also Read: 6 Methods to fix Windows 10 Script Host Erorrs
What is Blue screen Registry Error 51??
It is an error typically called the 0x00000051 or 0x51 belonging to the vast list of I/O BSOD which forces the system to shutdown or restart unexpectedly.
Cause for the Blue Screen Registry Error 51
- Your device driver may be incorrectly configured or it may be old and corrupted.
- It may be the virus or malware infection that has corrupted Windows file system.
- REGISTRY_ERROR STOP may occur due to memory (RAM) corruption.
- Due to recent software change, the Windows registry files may have got corrupted.
- Blue screen Registry error may also be caused due to a damaged hard disk.
Methods to fix Blue Screen Registry Error 51
Method 1: Clean Boot Process
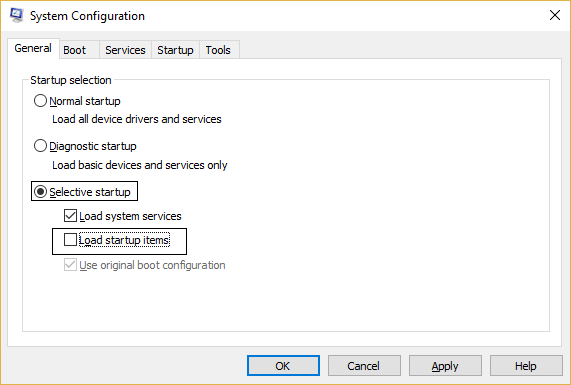
Step 1: Press the Windows key + R to open the Run commander.
Step 2: Type msconfig and click OK to open the System Configuration.

Step 3: Click on the Selective Startup in the General Tab and uncheck the option Load Startup Items.
Step 4: Now, navigate to the Services Tab and checkmark the box with “Hide all Microsoft Services”.
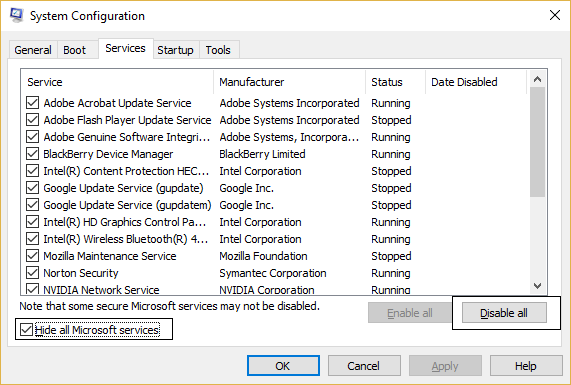
Step 5: Now, click on the “Disable all” button in the same tab shown above. It will disable all the unwanted services running.
Restart your PC to check if the problem still occurs or not. Make sure to undo the above steps after you have finished with the trouble shooting.
Method 2: By Repairing with the Windows 10 Bootable Disc
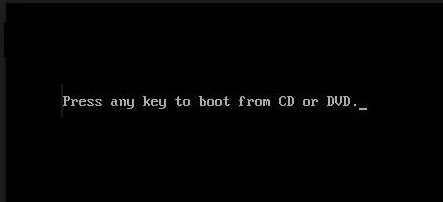
Step 1: Insert the Windows 10 bootable installation disc. Then, restart your PC.
Step 2: Press any key to continue the boot process from CD or DVD.
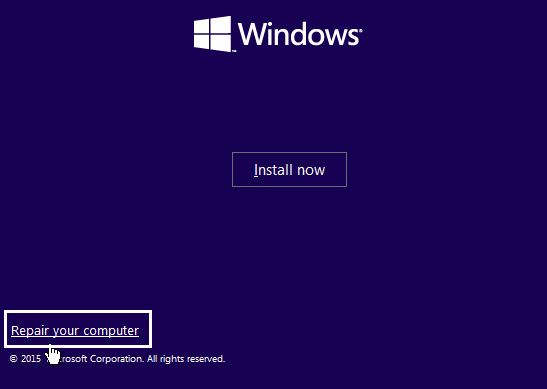
Step 3: Select your language as per your preference and click on “Repair your computer” shown at the Bottom left.
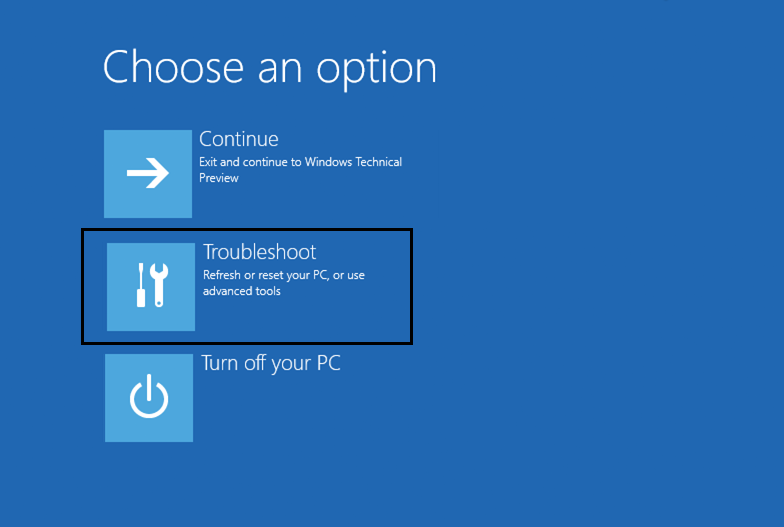
Step 4: You will be shown choose an option screen. Click on Troubleshoot.
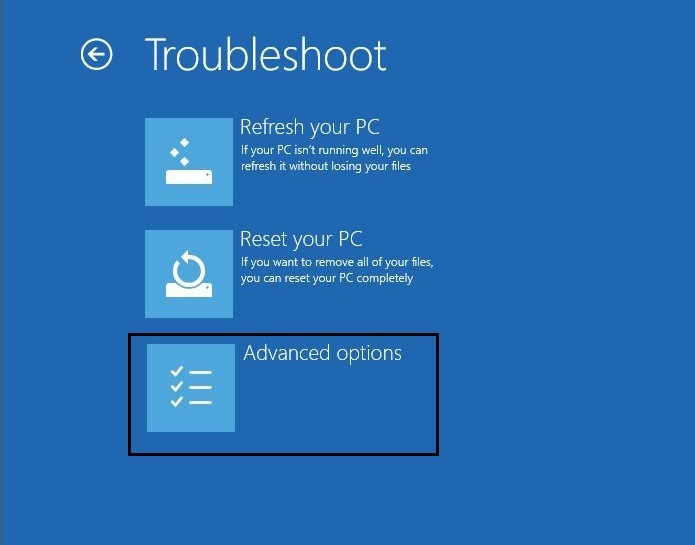
Step 5: Click the “Advanced options” on the Troubleshoot screen.
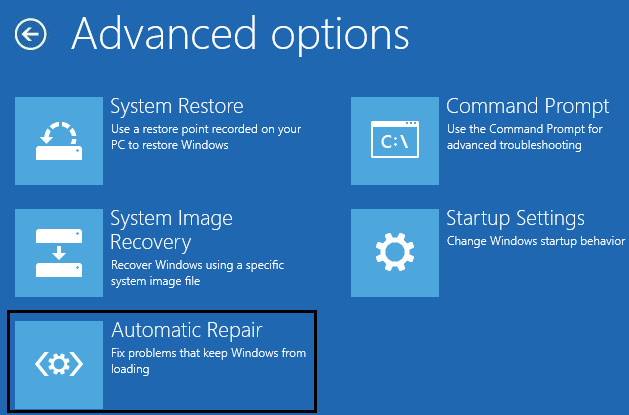
Step 6: Click “Automatic Repair” on the Advanced options.
Wait for the Windows Automatic/Startup repair process to complete. Restart your system and check if the error again occurs or not.
If you are still unable to fix this error, then follow the other various methods which will definitely help you.
Method 3: Run System File Checker (SFC) and Check Disk (CHKDSK)
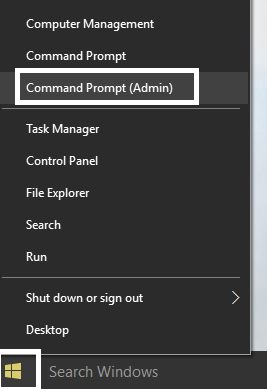
Step 1: Press the Windows key + X to open the Command prompt (Admin).
Step 2: Now, type the following command and hit enter.
sfc/scannow
Step 3: The above command will run a system scan. Wait for the Scanning process to complete.

Step 4: Now enter the command “CHKDSK”. It will examine your basic file system structure for errors and fix it up automatically.
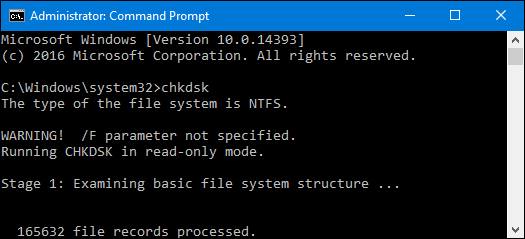
Step 5: Wait for the above process to complete and restart you PC to save changes.
Method 4: Run Advanced Memory Diagnostic Tool (Memtest86+)
![]()
Memtest86+ is an advanced memory diagnostic tool which removes all the corrupt memory data from your PC. It is better to run an external program for memory scan rather than interrupting with the default windows internal scan process.
Step 1: Connect a USB flash drive to your PC
Step 2: Download and install Windows Memtest86+ auto installer.
For your convenience I have setup a direct downloading link for Memtets86+
Click here to Download
Step 3: After you have extracted the zip file, run the installer to execute the setup process.
Step 4: Burn the Memtest86+ software in your plugged in USB drive.
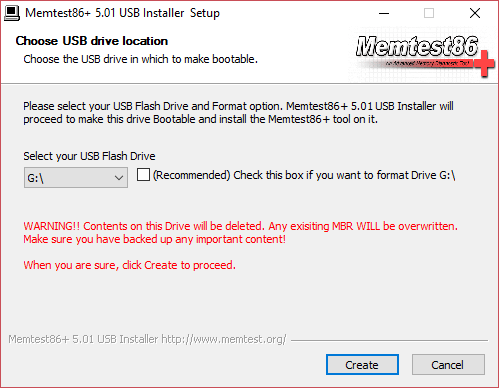
Step 5: Restart your PC and make sure you boot from the USB drive in which the Memtest86+ software is installed.
Step 6: Memtest86+ will start scanning for corrupt memory sectors in your system.
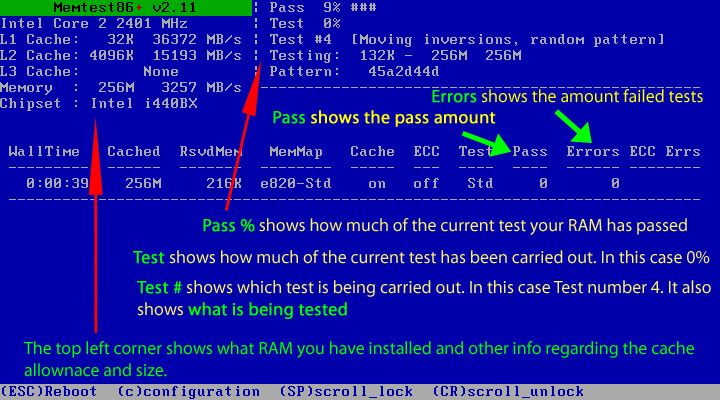
Step 7: If it qualifies for all the 8 phases of the scanning process then your system memory is working fine.
If it fails to pass all the phases of the Memtest scanning process, then your blue screen registry error 51 is due to the bad/corrupt memory. Then there is no option to fix the bad memory sectors other than by replacing the RAM.
Method 5: By Updating your Drivers

Every program on your PC works primarily because of the Drivers. The Blue Screen Registry error 51 may also occur due to malfunctioning of your Driver or may be it has become corrupt. So, it is very important to keep on updating your Drivers regularly.
It is but obvious that you cannot check and download for each and every single driver. There are tools which contain driver update for important system programs. It will automatically scan and update for the various drivers if needed.
I would suggest you the Driver Agent Plus tool which will automatically update all your drivers.

I have set up a direct downloading link for the full version of this Software tool.
Click here to Download
Method 6: Run System Restore
If none of the above methods worked in resolving the Blue Screen registry error 51, then simply go for System Restore. This option will definitely help you in fixing up the registry 51 error. It will also remove the unwanted malicious files in your system due to which your PC crashes or slows down.
Also Read: 6 Methods to fix Windows 10 Script Host Erorrs
If you are still not able to sort out this problem, then contact us at: info@officialtechsupport.com

Our customer care service is available 24/7 to sort out your technical queries.